부투캠프 환경 매직마우스2, 매직키보드2, 매직트랙패드가 윈도우 10에서 페어링이 되지 않는다면
맥으로 다시 부팅 후 설정 > 블루투스 > 페어링된 마우스/키보드/트랙패드 삭제 후 다시 페어링
윈도우 부팅하면 맥에서 연결설정을 그대로 가져와서 연결되더군요..
부투캠프 환경 매직마우스2, 매직키보드2, 매직트랙패드가 윈도우 10에서 페어링이 되지 않는다면
맥으로 다시 부팅 후 설정 > 블루투스 > 페어링된 마우스/키보드/트랙패드 삭제 후 다시 페어링
윈도우 부팅하면 맥에서 연결설정을 그대로 가져와서 연결되더군요..
Windows 구성요소저장소에서파일손상여부확인
https://answers.microsoft.com/en-us/windows/forum/windows8_1-performance/windows-81-hangs-on-please-wait-screen/fb09be8c-8297-4660-bfe6-845eab394e9d
powercfg.exe /setactive 8c5e7fda-e8bf-4a96-9a85-a6e23a8c635c
In Windows 8, Windows 7 and earlier, you can choose from predefined power plans which are a group of several power-related settings. If you are running a laptop on battery, you can choose the "Power Saver" plan. If you are running a desktop PC which is on AC power, you can set the "High Performance" plan. To switch the power plan, Windows gives you only two options if you use the notification area power icon. One of them is always the "Balanced" plan. This is not ideal because you have to open the Control Panel and go to Control Panel\System and Security\Power Options to access all the available power plans. Today, we will show you how to save your time and switch the power plan directly from the command line or with a shortcut so you don't need to open Power Options Control Panel every time.
Windows Vista, 7 and 8.x come with a special command line utility, powercfg.exe. It allows you to change various power options with command line switches. It also provides appropriate switches to change the current plan directly.
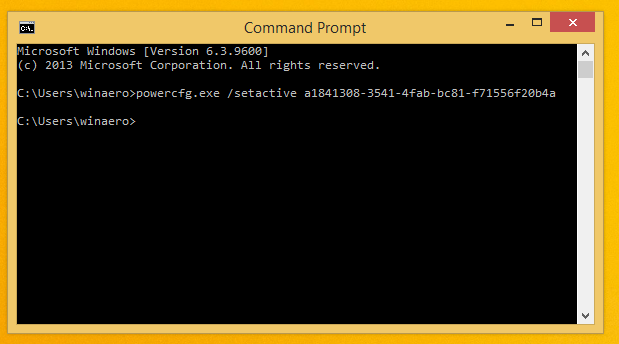
To activate the "Power Saver" plan, open the command prompt and type the following command:
powercfg.exe /setactive a1841308-3541-4fab-bc81-f71556f20b4a
It will switch your power plan directly.
To activate the "Balanced" power plan, you need to execute the following command:
powercfg.exe /setactive 381b4222-f694-41f0-9685-ff5bb260df2e
Finally, to activate the "High Performance" power plan, use this command:
powercfg.exe /setactive 8c5e7fda-e8bf-4a96-9a85-a6e23a8c635c
You can create a shortcut for each command to switch between power plans quickly. Additionally, you can assign a global hotkey for every shortcut to switch between them with the keyboard. You can also pin them to the taskbar and set nice icons for the pinned shortcuts.
안전모드로 부팅 후 Administrator계정으로 로그인 후 CMD실행 후 아래 동영상 참고하여 password 초기화
https://youtu.be/Ktk9cQuIqBc
안되는 경우도 있습니다.
시놀로지 NAS에 WebDAV를 설정 후 윈도우 탐색기>내컴퓨터>네트워크 위치 추가 로 WebDav에 접속하려고 하니
접속이 되지 않고 에러가(입력한 폴도가 올바르지 않습니다. 다른 폴더를 선택하십시오.) 발생합니다.
NetClient등의 3rd party 프로그램에서는 잘 접속 되는 부분으로 볼때 윈도우 설정을 점검해 봐야 겠다고 생각하고
구글링하여 아래와 같이 해결하였습니다.
1. Regstry 수정
HKEY_LOCAL_MACHINE\SYSTEM\CurrentControlSet\Services\WebClient\Parameters\BasicAuthLevel 값을 2로 변경
0 - Basic authentication disabled
1 - Basic authentication enabled for Secure Sockets Layer (SSL) shares only
2 or greater - Basic authentication enabled for SSL shares and for non-SSL shares
아래와 같이 정상적으로 로그인 창이 열립니다.
2. WebDav에 저장된 파일 용량이 50M이상일 경우 업/다운로드가 안되는 문제는 아래 Registry를 수정하면 됩니다.
(에러: 파일 크기가 허용되는 한도를 초과하여 파일을 저장할 수 없습니다.)
HKEY_LOCAL_MACHINE\SYSTEM\CurrentControlSet\Services\WebClient\Parameters\FileSizeLimitInBytes 값을 선택 후 10진수를 체크한 후 용량을 올리면 됨. (최대 4GB라고 합니다.)
http://www.howtogeek.com/howto/windows-vista/how-do-i-kill-all-the-iexploreexe-processes-at-once/
Kill Multiple Processes From the Command Line
The first thing you’ll need to do is open up a command prompt, and then use the taskkill command with the following syntax:
taskkill /F /IM <processname.exe> /T
These parameters will forcibly kill any process matching the name of the executable that you specify. For instance, to kill all iexplore.exe processes, we’d use:
taskkill /F /IM iexplore.exe
Create an Icon to Force Kill All iexplore.exe Processes
Since we don’t really want to drop to the command prompt every single time we want to recycle Internet Explorer or Chrome, we can setup an icon to do the work for us.
Right-click anywhere on the desktop and choose New \ Shortcut:

With no document open you can go to Edit > Preferences > Documents, there you will find "Documents in recently used list" with a field next to it. If you set the number to "0" there, there will be no more recent documents in the list.
https://answers.acrobatusers.com/How-I-remove-Acrobat-Pro-DC-startup-recent-files-page-q255556.aspx
| ||||||||
|---|---|---|---|---|---|---|---|---|
| 설명 | APP Center (Intel 8/9/X99 series) (Note) Support Intel 8/9/X99 series motherboards (support may vary by model). (Note) Please install Microsoft .NET Framework 4.5 first before install APP Center utility. OS:Windows 7 32bit,Windows 7 64bit,Windows 8 32bit,Windows 8 64bit,Windows 8.1 32bit,Windows 8.1 64bit,Windows 10 32bit,Windows 10 64bit | |||||||
| 다운로드 | 아시아 중국 어메리카 유럽 유럽(러시아) : FTP / Http | 사이즈 | 22.16 MB | |||||
http://www.gigabyte.kr/support-downloads/Utility.aspx
앱센터를 설치합니다. 설치 후 프로그램을 실행하여 업데이트를 해주세요.
그리고 @bios를 설치하면 윈도우 상에서 bios를 업데이트 할 수 있습니다.


 APP Center (Intel 8/9/X99 series)